
Welcome back to our Filemaker Add-On series, where we review and implement each of the free FileMaker add-ons offered for FileMaker 19 in the Claris Marketplace.
In this edition of the spotlight, we’re taking a deep look at the Calendar. Prior to FileMaker 19.1, building a robust, native calendar interface in FileMaker typically required some form of repeating fields, portals, and/or list view, combined with multiple layered objects or layouts. With the Calendar Add-on, a calendar interface can be quickly added to any solution with very little hassle. As with any solution, there are a few things to keep in mind before adding the Calendar.
Requirements
The requirements for the Calendar are minimal, but it’s important to have a couple of them taken care of before dropping the add-on onto a layout:
-
Make sure you’ve updated to at least FileMaker Pro 19.1.3.
-
Prepare a layout with a body that will hold the add-on Web Viewer object (at least 940pt width and 492pt height).
-
Add a table to store the event data.
-
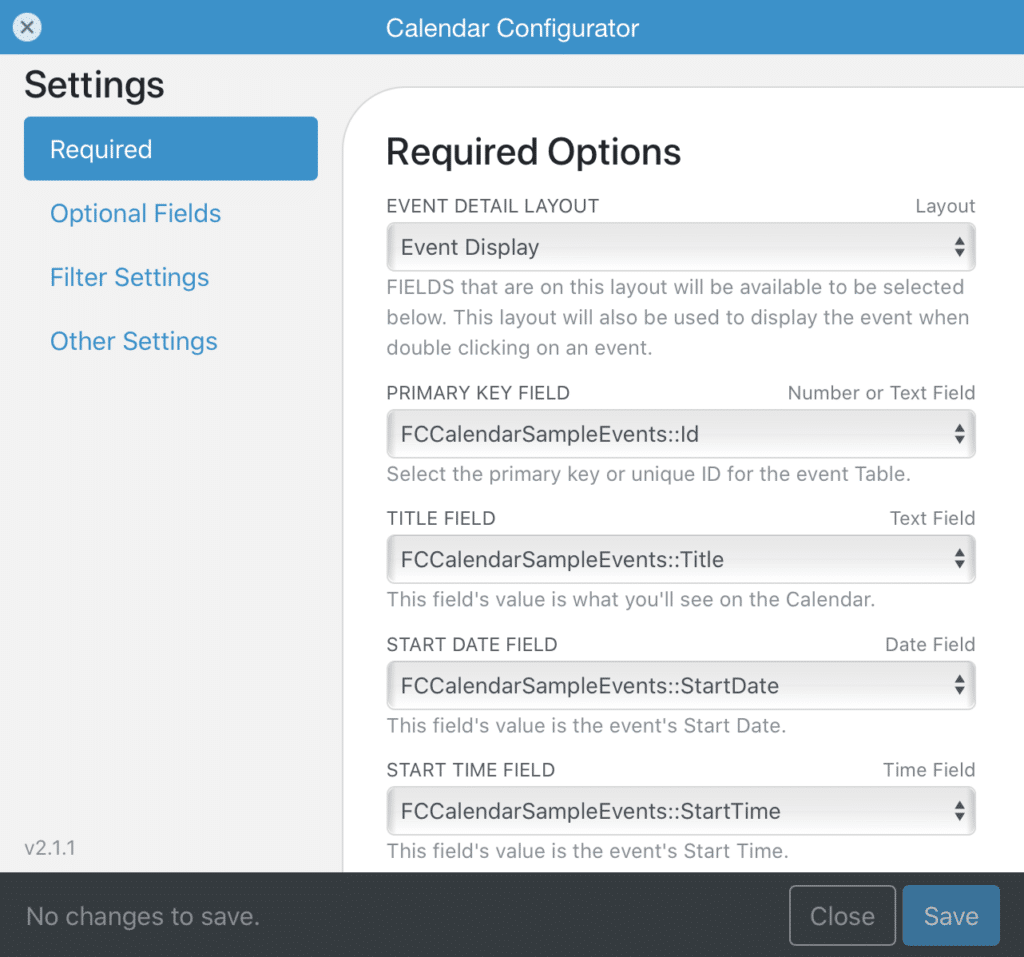
Define the required fields needed to implement the calendar (primary key, title, start/end dates, start/end times).
Installation
As with the other add-ons, the Calendar is simple to install:
-
Enter layout mode.
-
Go to the Add-ons tab.
-
Click the + button at the bottom-left.
-
Select the Calendar.
-
Click “Choose”.
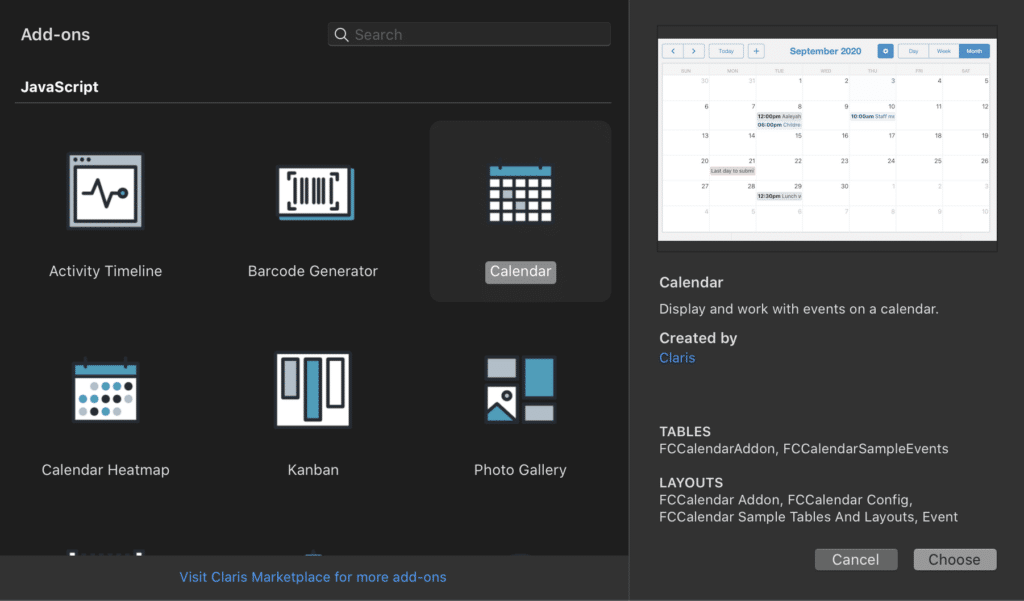
Once the add-on is installed, simply drag-and-drop the object onto the prepared layout. Once you enter back into browse mode, click the gear icon to show the configuration menu, where you can define the fields to be used for the calendar data-entry and FM Data API calls.
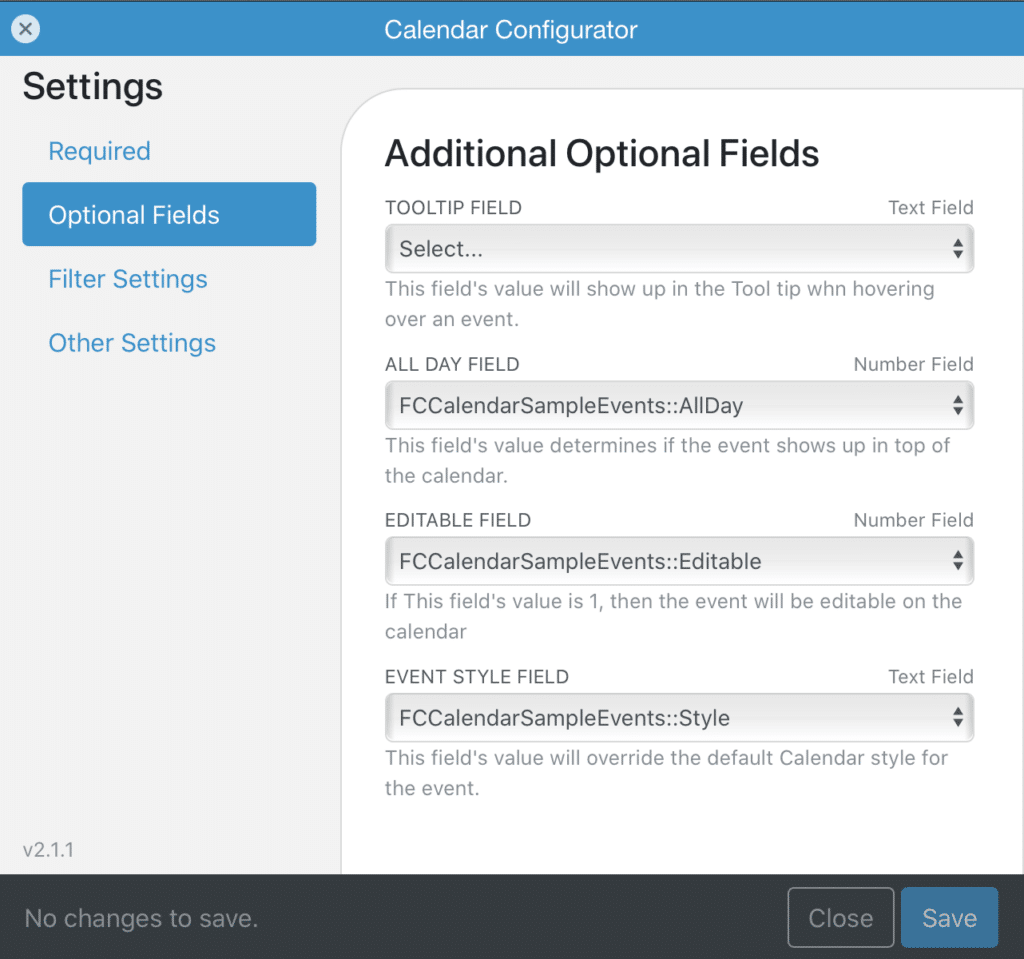
From there, you can configure the optional settings, which include:
-
Tooltip – field to show when hovering over an event in the UI.
-
All-day field – this is typically a checkbox to mark an event, which moves the event into the “all-day” section of the calendar.
-
Editable field – a boolean field that designates if the event is editable. If marked as true (1), the event will be editable. If null, the event cannot be edited.
-
Event Style field – basically, this changes the color of an event in the calendar UI.
From here, you can specify the Filter Settings by defining a Filter field, which will filter the events to show on the calendar, and a Search field, which will allow the user to search/filter down the shown events. The Other Settings tab will allow you to define a default style (color), specify the day on which to start the calendar (Sunday or Monday), and set the default calendar view (day, week, or month).
Since the configuration is stored locally, the HTML/CSS can be further configured to your desired look and feel. We’ve implemented this add-on into a couple of solutions and have only needed to make minor adjustments to match the existing solution themes.
Using the Calendar Add-on
Once the add-on is configured, it’s immediately ready for use. The calendar UI works similarly to most any other calendar UI (Google Calendar, Apple Calendar, etc.) The add-on works great on a desktop and, with some minor layout changes, works great on any mobile device, including WebDirect.
Implementing Into Your Solution
If you have an existing solution with event data, but need a smooth, easy to use, free, calendar interface, give the Calendar Add-on a try. Though it doesn’t have the feature set of the paid add-ons, it’s simplicity and price (free!) make it a winner in our book.
Comparisons
There are a number of paid calendar add-ons in the Claris Marketplace that are worth a mention.
We have had the opportunity to implement the SoSimple Calendar add-on, which features separate calendar resources, a much more customizable UI, individual user-defined settings, as well as Google Maps integration. For $399 (limited time as of this post!), the SoSimple Calendar gives a feature-rich add-on that’s also very easy to implement and use.
The Calendar Kit add-on by Richard Carlton Consulting is another paid add-on ($49). Although we have yet to implement this option into a solution, the screenshots and video from their website show a number of features, including tasks, resource calendars, user calendars, and an agenda view.
If you’ve been in the FileMaker community for any amount of time, you’ve certainly heard of SeedCode. They have taken their popular DayBack calendar and turned it into an add-on. This calendar is the most feature-rich calendar we have had the pleasure of using, as we have implemented their classic version into a number of solutions and have been very impressed with its overall usability and features. Because the DayBack add-on is engineered as a hosted solution, their pricing structure is more designed as a vertical market app, starting at $9.89/user billed monthly. If you need a calendar solution to not only manage events but also manage multiple schedules, share calendars, integrate with Office 365/Basecamp/Google, and view calendar analytics, give DayBack a try with a free 30-day trial.
Here to Help
As always, if you have any questions regarding which calendar add-on is best for your solution, or if you would like assistance implementing any of these into your solutions, please feel free to send us a message or use our new Calendly calendar for a free 15-minute consultation.