Barcode Generator Add-On
With FileMaker 19.1.3’s release recently, we’ve been experimenting with the new add-ons feature in earnest. We just recently published a blog post on our first internally created add-on, the PBS Logging add-on from Kate Waldhauser. You can check out that blog post and download the free add-on here.
For my part, I set out to pick one of the JavaScript add-ons (mostly at random) that comes with FileMaker 19.1.3 and experiment with it. I chose the barcode add-on.
Barcodes are an essential tool in the modern IT world and being able to add them into your solutions without a plugin or barcode font is a welcome addition to native FileMaker functionality. Our clients use barcodes to identify products they’re selling, to apply a serial number code to a manufactured item, and to build a scannable shipping manifest among numerous examples.
Documentation is limited at this stage, so I’m hoping this blog post will assist others in implementing the Barcode Generator add-on.
Requirements
This won’t be a long post, as the Barcode Generator add-on is pretty easy to use, but please make sure you have a few requirements taken care of up front:
-
Make sure you’ve updated to FileMaker Pro 19.1.3 (the updater can be downloaded here)
-
Make sure you are connected to FileMaker Server 19 if you are working in a hosted solution. (I did my first 20 minutes of experimenting with the Barcode Generator add-on in a solution running on FileMaker Server 18. You do not get any especially meaningful errors, but the bar code never appeared.)
-
You should select a field that you want to encode as the barcode. Different barcode symbologies support different characters and lengths. For simplicity in this blog post, we’re going to use Code39, a very simple symbology that will encode letters and numbers. It doesn’t do any compression and therefore it doesn’t support long text objects well. I’m going to use a field that is 8 characters in length. You could certainly use longer. The maximum character length for Code39 is 43 characters, though that would make a very wide bar code.
-
You should have a container field (or create it) for storing the bar code image that will be generated by the add-on. I created a field in my solution, creatively called ‘Bar_Code’.
Installation
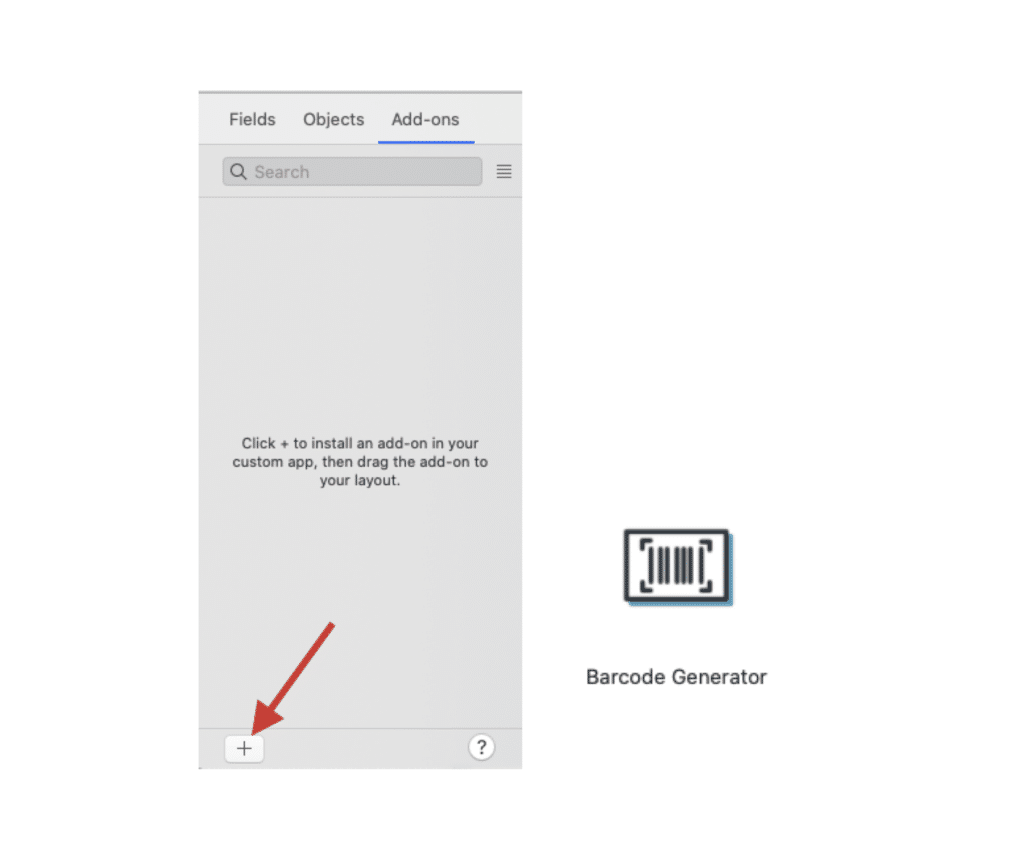
Installing the add-on in your solution is easy. Simply go into layout mode and click the add-ons tab of the left hand pane. You’ll see a plus symbol in the lower left hand corner. Click this to install an add-on into your solution. I selected the Barcode Generator add-on and clicked OK (please also see the official Claris documentation here).
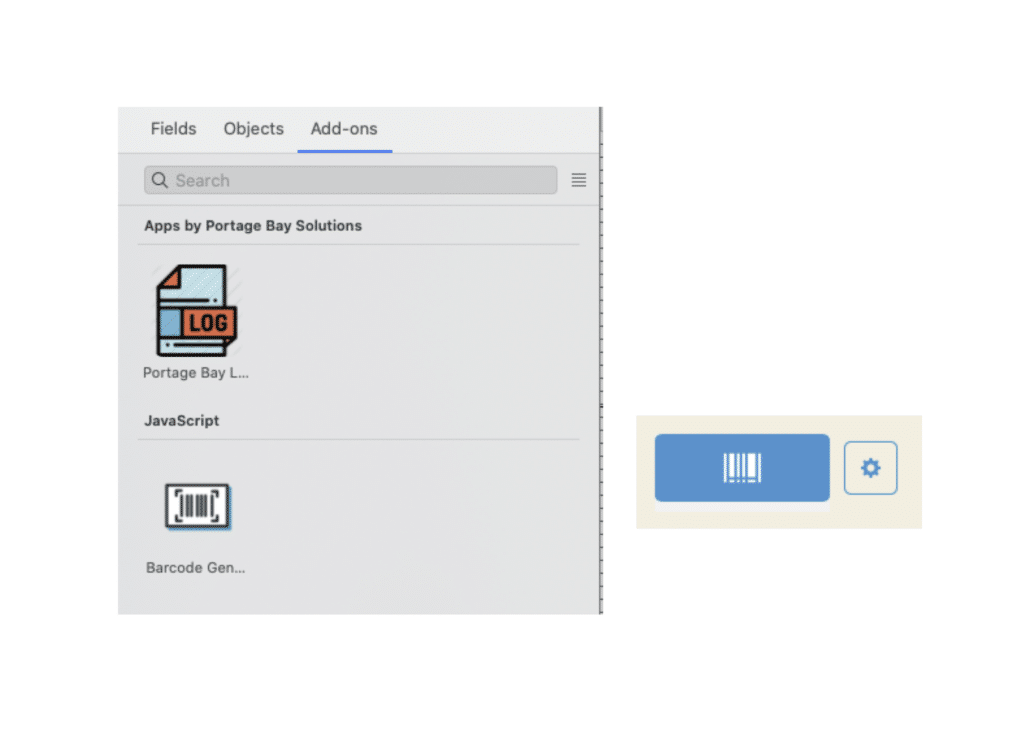
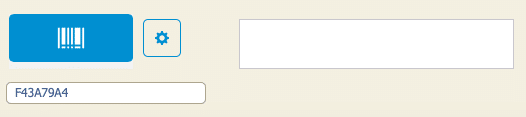
After this, the Barcode Generator will appear in your list of installed add-ons like you see in the screen capture below. In this image, you can see that I’ve previously added the Portage Bay logging add-on. All you have to do next is drag and drop the bar code generator icon onto your layout. You’ll end up with an object that looks like the right hand image below on your layout in browse mode.
Configuring the Add-On
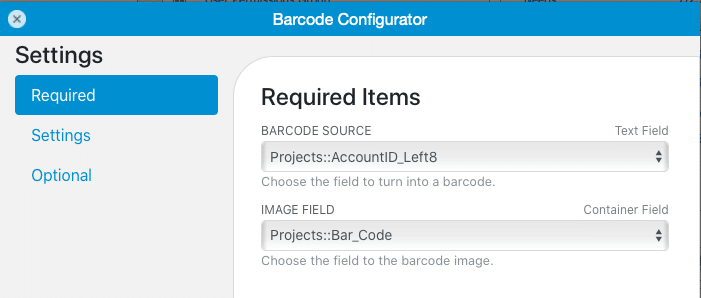
Next we’ll configure the add-on by clicking the gear icon in browse mode. In the two screens seen below, I’ve defined the field I want to encode, the field where I want the image to go, and the symbology I want to use.
-
It’s important to note that the fields I’m selecting have to be on the layout in order to be selected. The add-on is grabbing the names of all the fields on your layout to create the pop menu of field names.

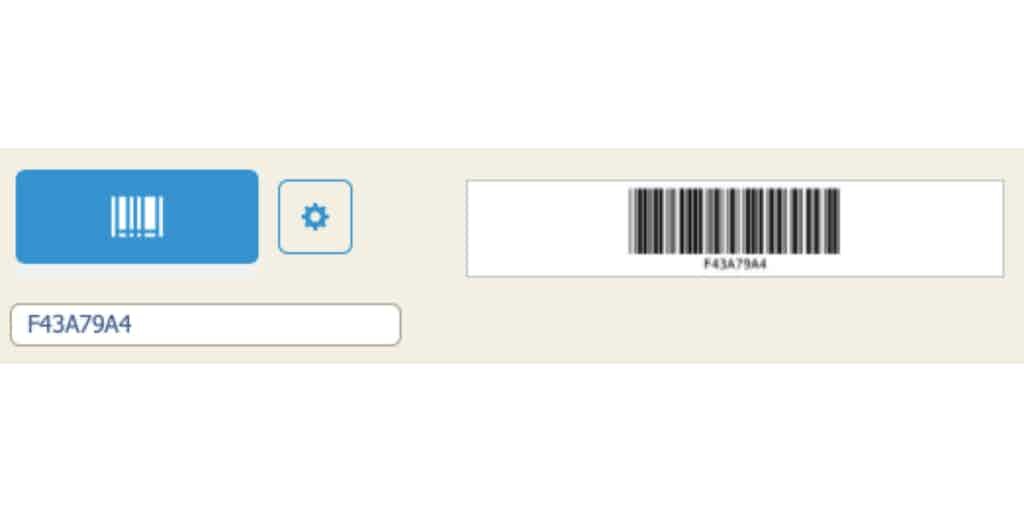
We have all the setup done, but you may have noticed that no barcode symbol appeared in your container field. Below I have the add-on web viewer object on the left, the field I’m encoding below that, and the bar code container field on the right.
Generating the Bar Code
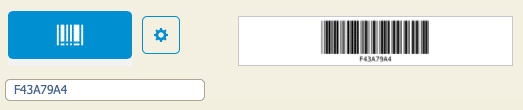
What I’m missing is a call to the script that actually generates the bar code.
When I installed the add-on in my solution, a folder full of scripts was installed, one of which is called ‘BarcodeGenerator Trigger Generate As Configured’. This script uses the Perform JavaScript in Web Viewer script step to populate my container field with the Code39 barcode image.
For purposes of my experimenting, I simply turned my bar code field into a button that calls that script, clicked the button, and voila…
More Info …
It’s unlikely you’ll want to click a button every time you want to generate the barcode. You would likely call the script from a trigger so that the barcode generates automatically as you create records in your database.
Multiple Barcodes
The add-on’s scripting is smart. It examines the layout and automatically works properly if you only have one barcode generator add-on object and one barcode field that you are populating. If you have a layout where you want to populate different barcode fields with different values, you’ll need to dig a little deeper into how the script can be passed to the add-on object’s UUID so that the correct field has its barcode created.
Printing Barcodes
You’ll be printing out your bar code, probably on labels, so that you can stick them on objects and scan them. The way the barcode will print is a function of the image format you choose on your FileMaker layout. I printed out a sheet of bar code labels in different sizes with different options and then did some test scanning with a barcode scanner. I think for a sheet of Avery 5160 labels (3 across by 10 down), making your container field approximately the length and width of the label (1” x 2 ⅝”) and choosing the ‘enlarge to fit’ option and unchecking the ‘maintain proportion’ checkbox will yield the most ‘scannable’ barcode. That said, I successfully scanned my 8 digit barcode with the bar code shrunk down as low as 1.4” wide (as small as I tested).
Your mileage may vary significantly on this last point. I would suggest creating a layout and putting multiple copies of your bar code field on it in different sizes and with different options for field formatting, then print it and test with your scanner.
If your encoded data won’t ‘fit’ in a Code39 barcode, you can try one of the symbologies that compresses your data, like Code128, if you don’t have any specific requirements for a particular symbology imposed on you.
We Can Help With Integration
Barcodes are pretty interesting and not that hard to integrate with your FileMaker solution. If Portage Bay can help with your FileMaker solution and integration of bar codes like Code39 or Code 128, please fill out the contact us form below. We can help with a wide variety of barcodes in your solutions, including symbologies not included in the barcode add-on, like QR codes.
Thanks for reading! Contact us below with any comments or questions you may have.