In the spirit of trying out the free Add-Ons that come with FileMaker 19.1.3, I will experiment with the Kanban Add-On in this article.
Kanban boards are useful project management tools to help visually depict work. They visually depict work at various stages of a process using cards to represent work items and columns to represent each stage of the process. For instance, one of our clients, VN Graphics, uses them to track the flow of a graphic design job through the initial order, design, pre-press, and production. I love Kanban boards so when I found out that Claris had included one in their free Add-Ons, I was excited to try it out.
Here is a general overview of steps, then we’ll go through each in more detail:
1. Check the requirements
2. Install the add-on in your solution
3. Get familiar with the sample board
4. Create your own board
5. Configure the add-on
6. Set up your selected layout
7. Include filter and query fields
8. Enjoy!
Check the requirements
As noted in our previous add-on blog posts, it is important to make sure you have a few requirements taken care of up front:
-
Make sure you’ve updated to FileMaker Pro 19.1.3 (the updater can be downloaded here).
-
Make sure you are connected to FileMaker Server 19 if you are working in a hosted solution.
-
Prepare a layout that will hold the add-on Web Viewer object (at least 1160pt x 720 pt).
Install the add-on in your solution
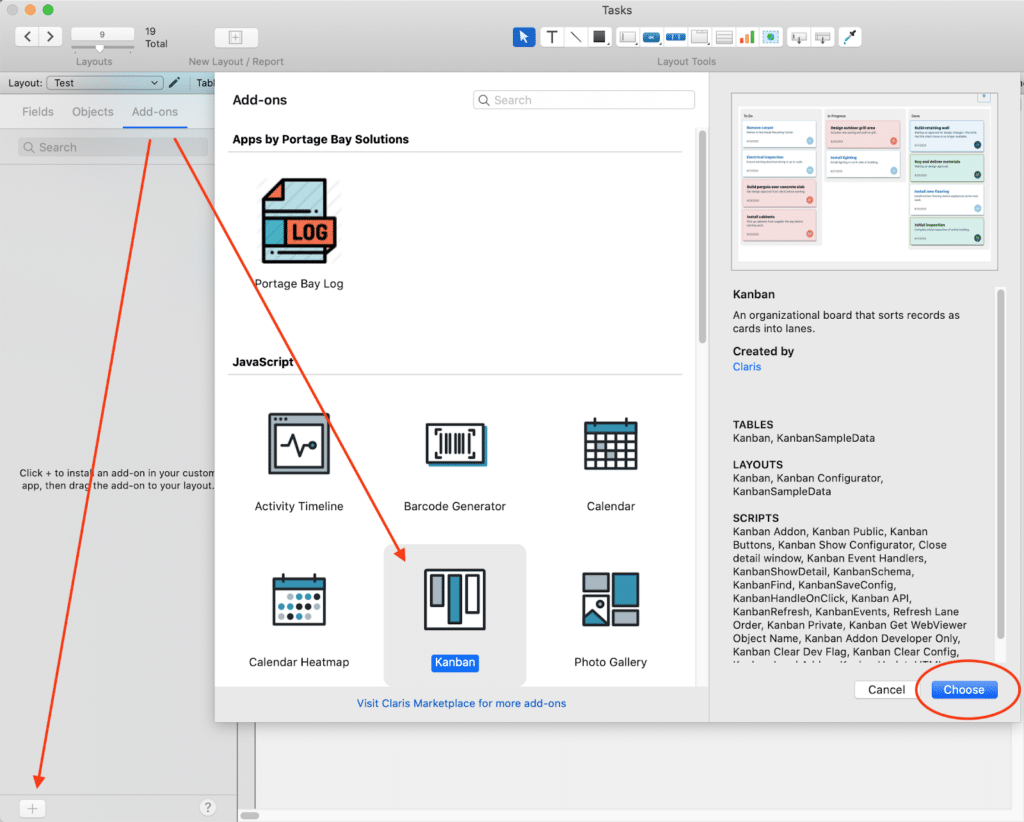
Installing the add-on in your solution is easy. Simply go into layout mode and click the add-ons tab of the left hand pane. You’ll see a plus symbol in the lower left hand corner. This will bring up a display of the different add-ons you can install. When selecting the add-on, you will see the description, tables, layouts, scripts, and other useful information about the add-on that will be installed into your solution when you add it.

I selected the Kanban add-on and clicked Choose (please also see the official Claris documentation here).
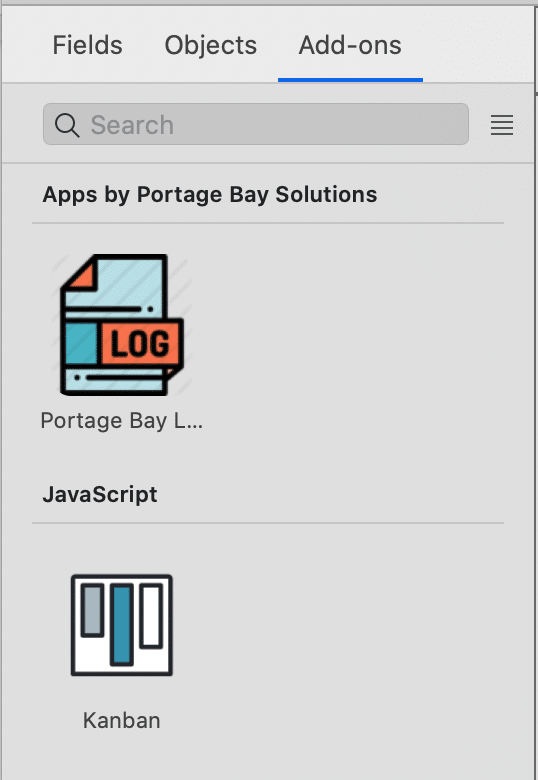
After selecting and choosing, the JavaScript Kanban add-on will appear in your list of installed add-ons like you see in the image below. In this image, you can see that I’ve previously added the Portage Bay logging add-on as well.
All you have to do next is drag and drop the Kanban icon onto your layout. This is where you will want to make sure your layout is large enough to hold the web viewer object (at least 1160pt x 720 pt).
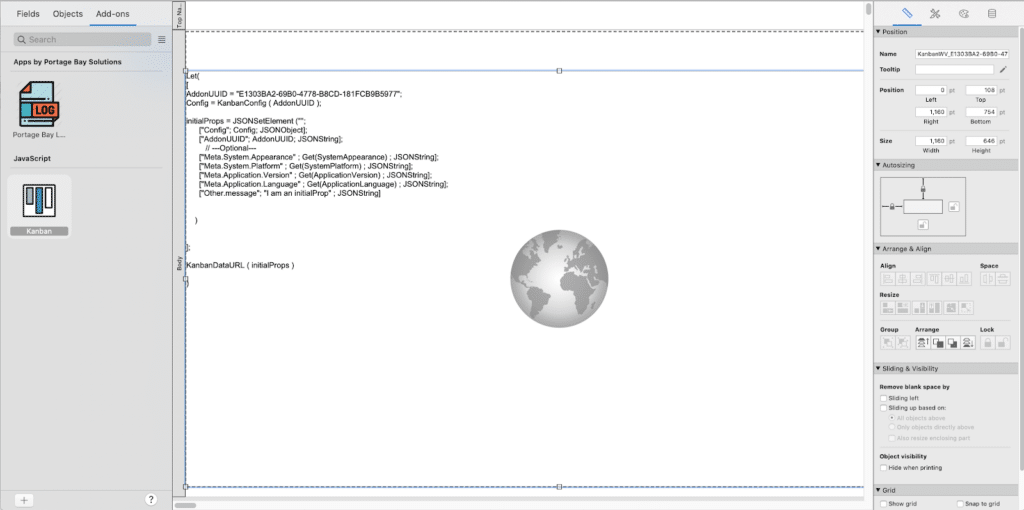
After saving that layout and going to browse mode, you’ll end up with a web viewer object that looks like this.
You can install multiple instances of the Kanban boards, each pointing to different or the same tables by just dragging the add-on onto a layout each time you want to create a Kanban board. The add-on is installed once, but you can add as many instances as you like.
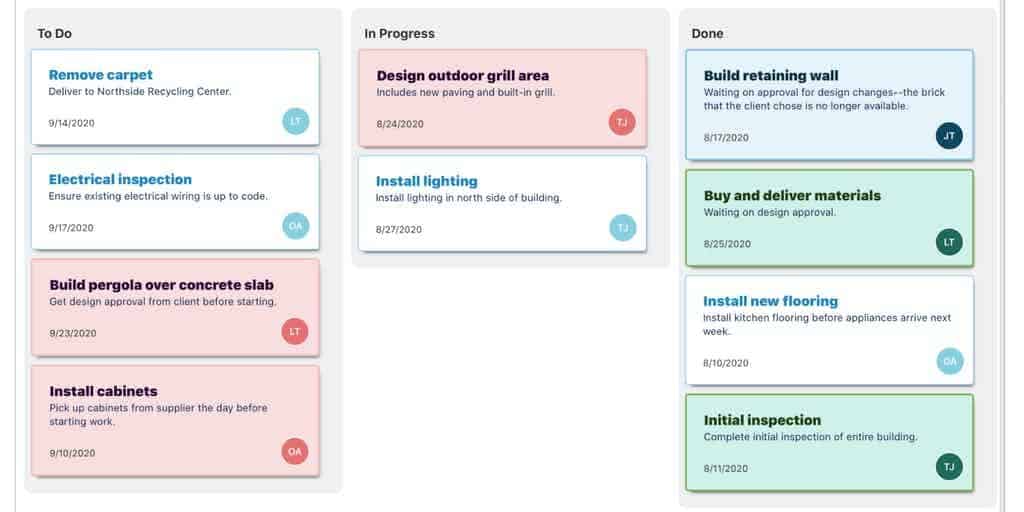
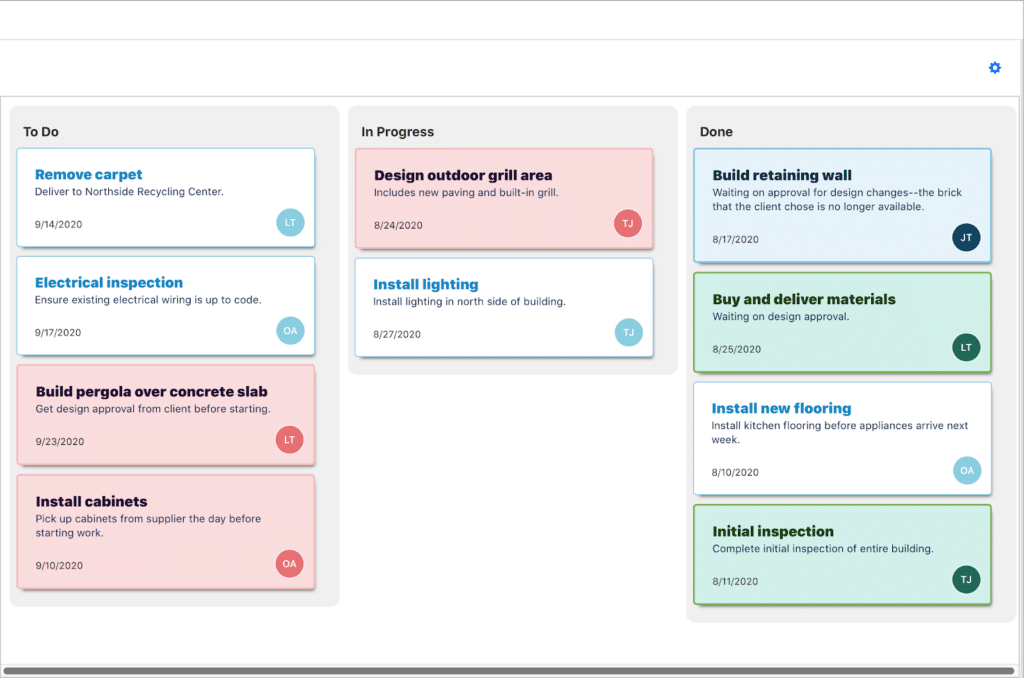
Get familiar with the sample board
At this point the web viewer is displaying the KanbanSampleData table included when the add-on was installed. You can now play with the cards on the Kanban board. It is nice looking, it works, and is pretty exciting; however, it doesn’t feel quite as fluid as other Kanban boards that I am used to, i.e., Trello and Jira. All in all, it is quite good especially considering its ease of implementation.
Create your own board
Using your own data isn’t much more work, but you should get familiar with the KanbanSampleData table first. An easy way to start testing your own data is to go into “Manage Database”, select the tab “Tables”, then select the “KanbanSampleData” table and click “Copy”, then click “Paste”.
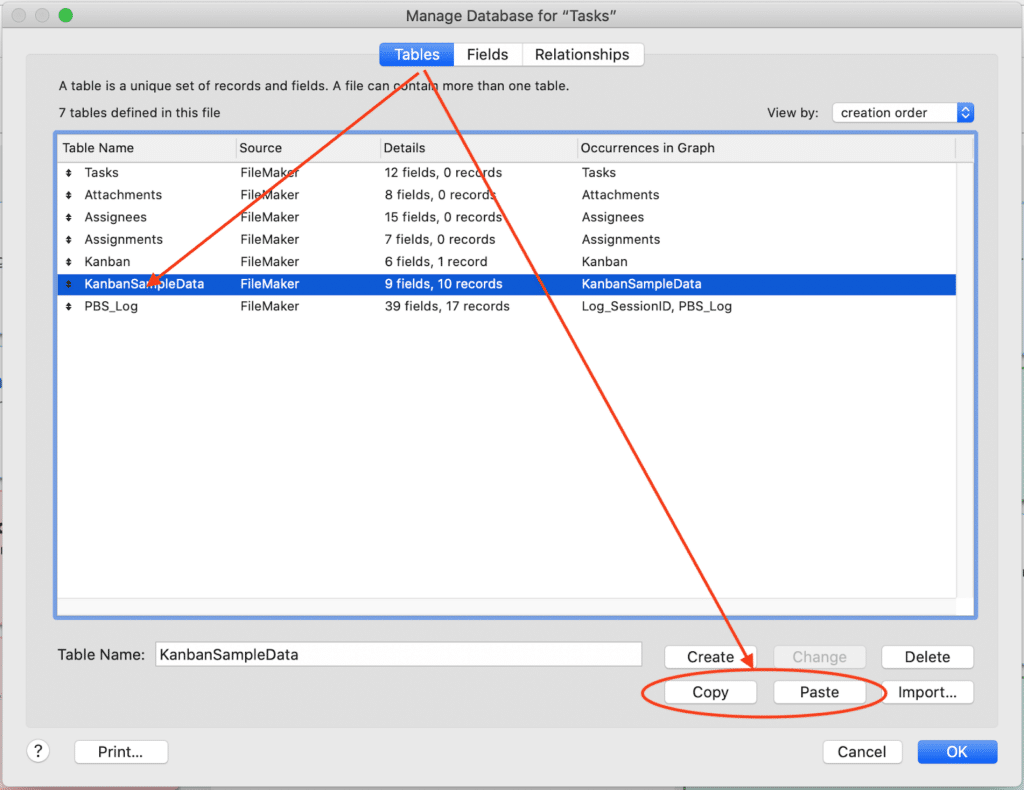
After that you will have your own copy of the KanbanSampleData to rename and rework as you see fit. In my instance I am going to change the name of the copy to “MySampleData”.
It’s important to note that using the SampleData tables that are included with the add-ons, for storing your own data, is not recommended. This is because the tables installed by the add-on are referenced very specifically. The current process to upgrade an add-on is to uninstall the add-on, and then install the new or upgraded add-on. If you use the original table that is referenced, you won’t be able to uninstall the add-on properly without the risk of losing your data.
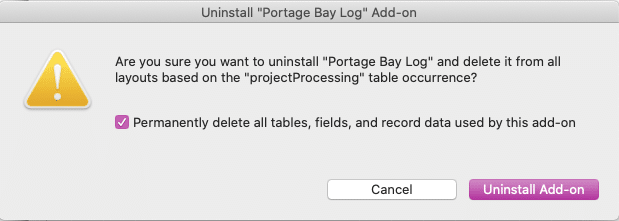
Should you need to uninstall, to upgrade or for other reasons, you can choose to permanently delete all tables, fields, and record data used by the add-on. Leaving this checked is the recommended process for uninstalling before upgrading. While care can be taken to mitigate after the fact, it is easier to use your own table and save yourself the hassle of trying to piece things back together if you choose NOT to remove them. This applies to all dependencies the add-on had installed like tables, value lists, layouts, scripts, and custom functions. Likewise, you will need to re-reference your own tables and the like after it is reinstalled.
Configure the add-on
Next we’ll configure the add-on by clicking the gear icon in browse mode. For this example I am using the tasks starter solution, and I have made a copy of the “KanbanSampleData” table and renamed it “MySampleData”.

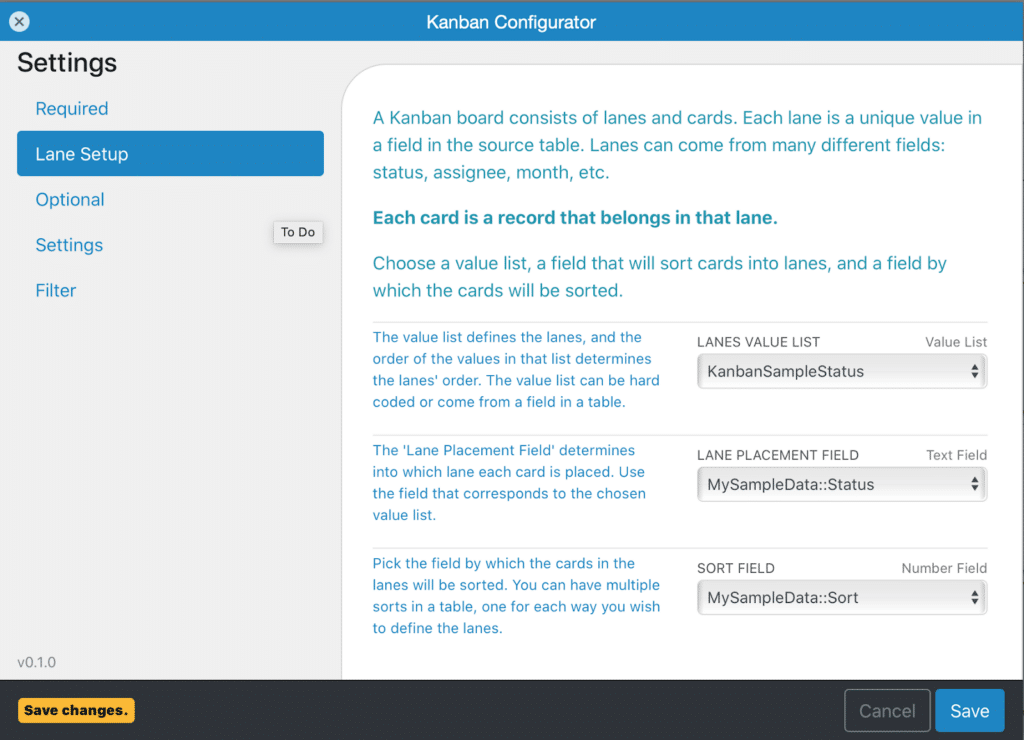
To use my own data, I am going to change the “DATA SOURCE LAYOUT” to be “MySampleData”. I can then select the fields from that layout that I want to reference.
It will flag all of the references that are required, and that lost their reference when you changed the “DATA SOURCE LAYOUT”.
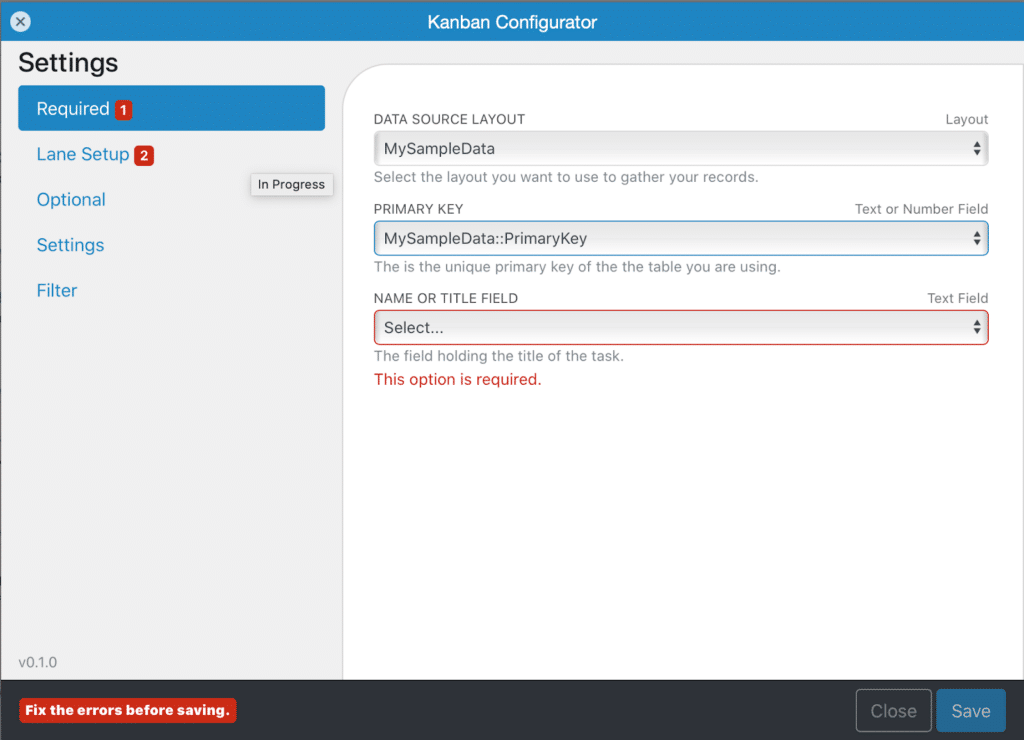
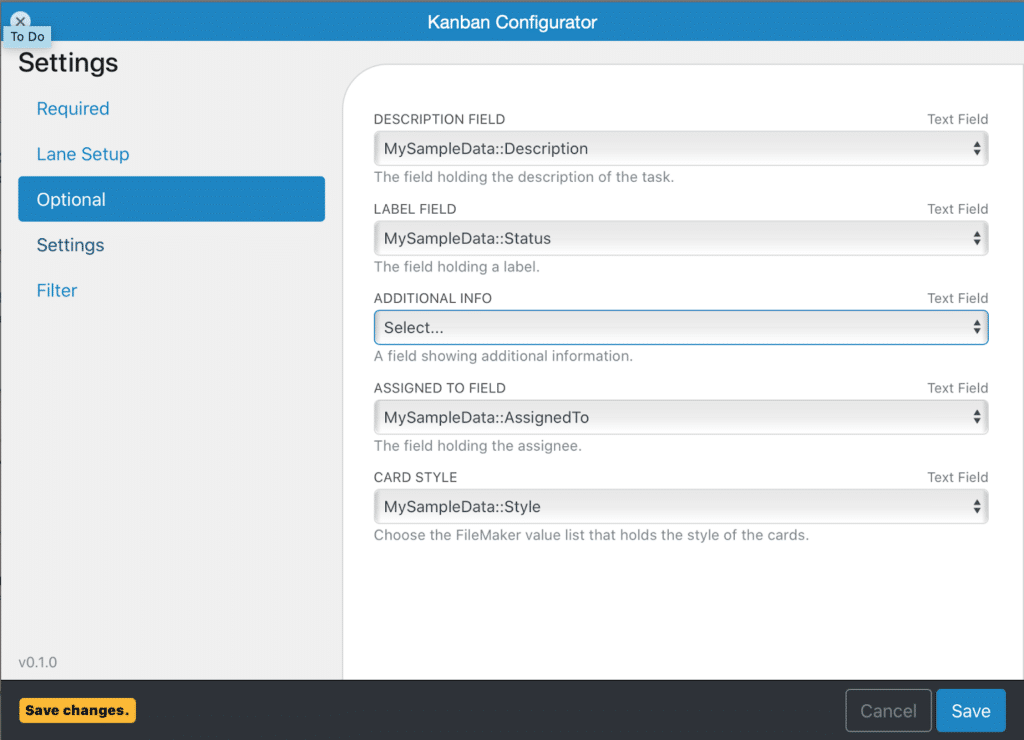
Now I am going to go through the different settings and re-select the fields from the “MySampleData” layout. Notice fields that are not required will not be flagged, but I am going to still select those so that it functions as intended.
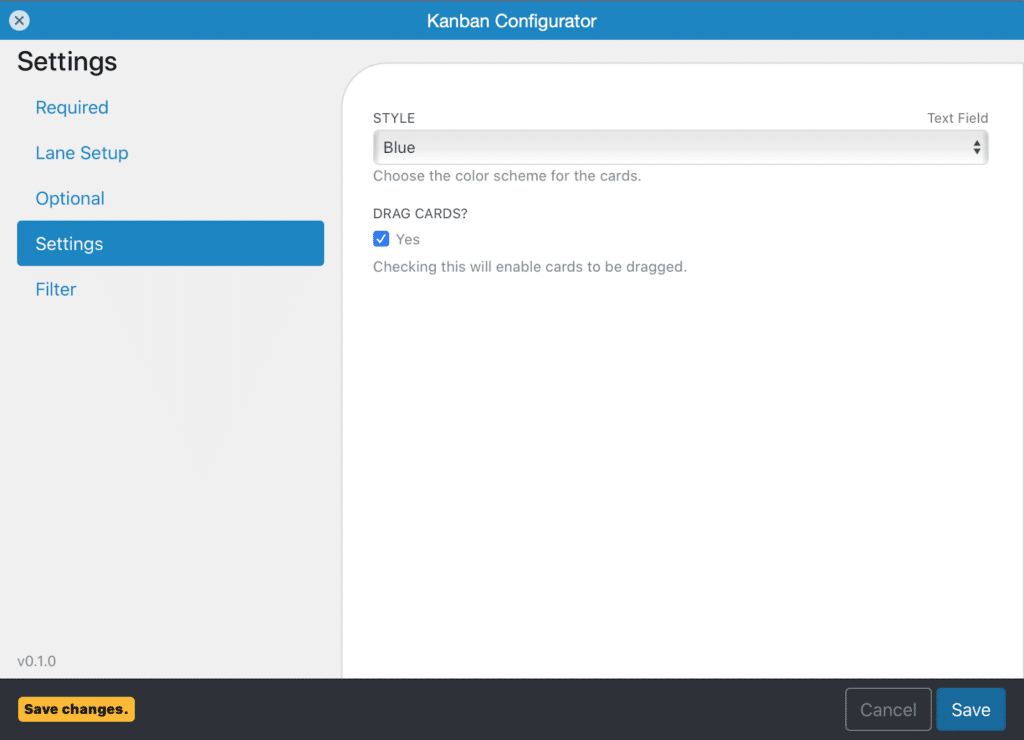
When you are all done, be sure to Save your changes!
Set up your selected layout
Next, we need to set up the layout we had selected in order to use it for data entry by the Add-On. To do that I am going to mimic the “KanbanSampleData” layout.
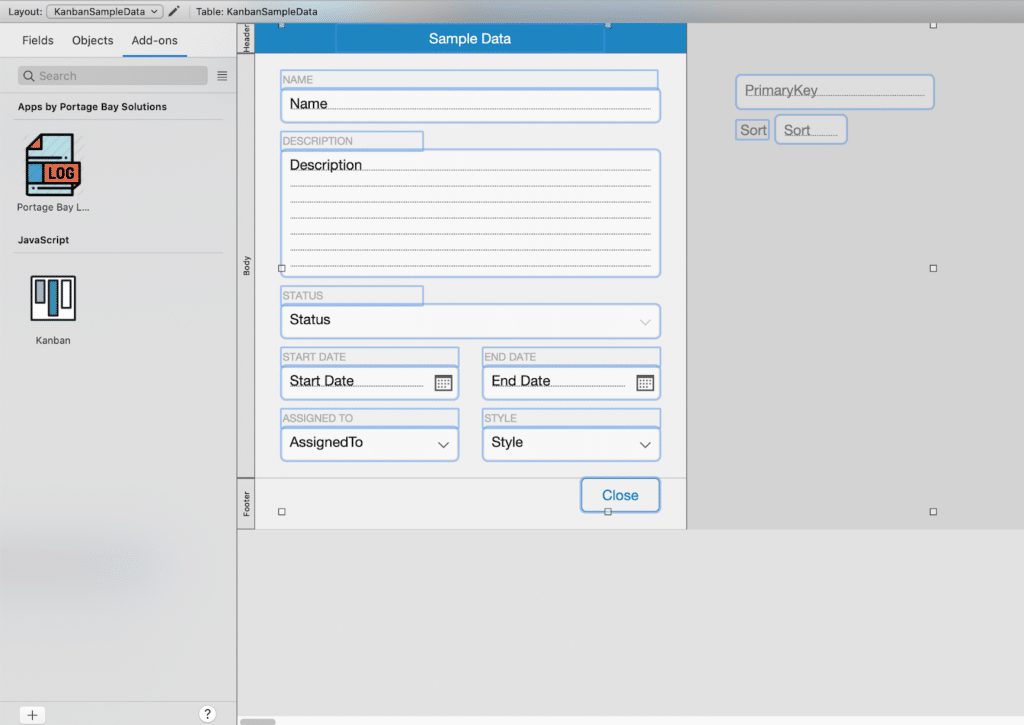
In the image below, I have copied the items from that layout and then changed the reference to the fields on “MySampleData” layout. Be sure to update any control styles like drop downs, and popups that you want to be your own.
It is also important to make sure you include the “Close” button. You will need that. When I first did this, I forgot about the importance of that button and I got stuck in a card window that couldn’t be closed. I was forced to quit FileMaker to get around it.

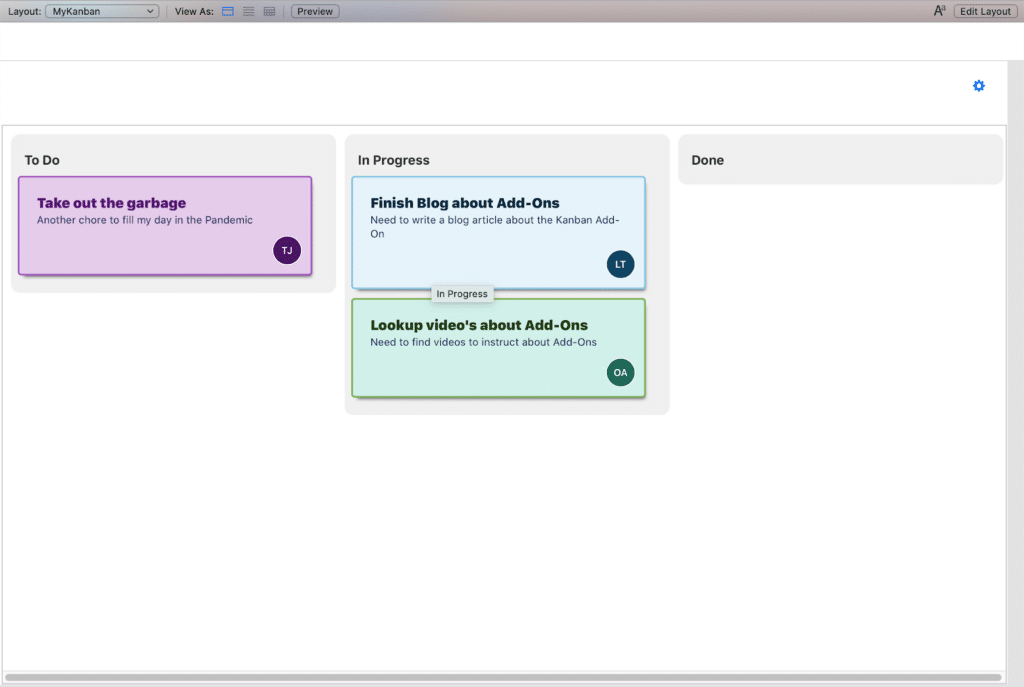
I was surprised at first after saving because the page was empty. However this result was to be expected as the MySampleData table had no records, and therefore nothing to display. Sure enough, after adding records, I saw the data shown in the image below:
Include filter and query fields
The last feature that we should include is the filter and query fields. To do this we need to add a field that stores the query we will type, and reference it in the add-on settings.
If we open up the settings again and go to the filter section, we can set the “SEARCH FIELD” to the field on our layout that we want to search against. Then select the “QUERY FIELD” that we want to store the query in. In this case I used the “Kanban::QueryField” since it is built in.
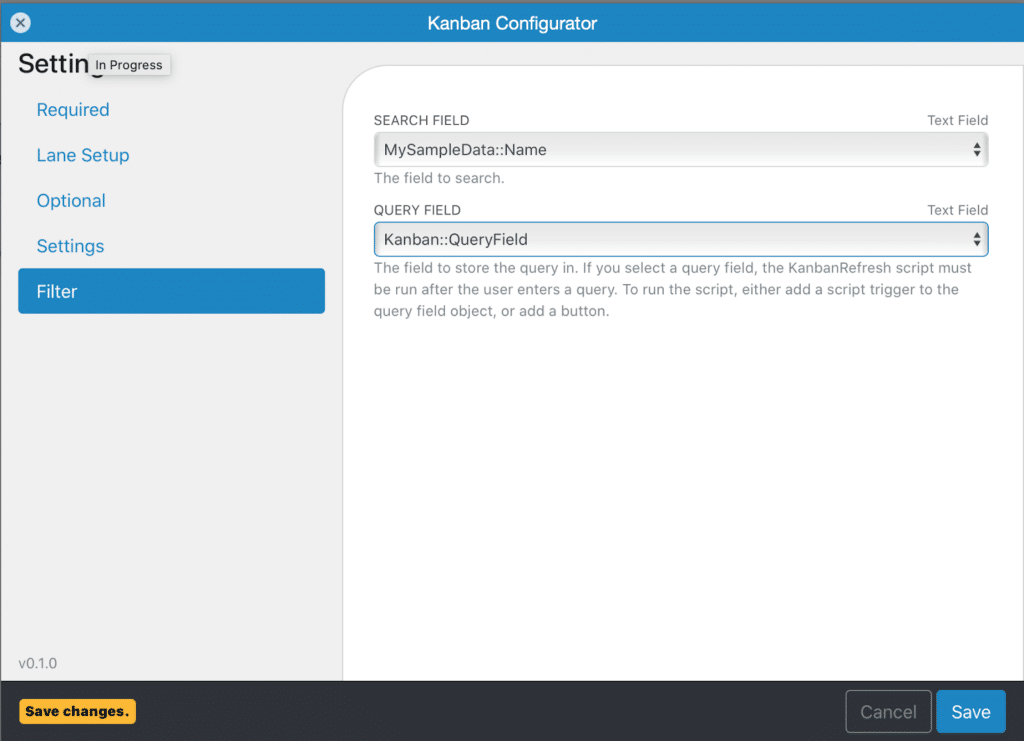
If you are adding this process to your layout, take note of the instructions about the query field.

You will then need to add this field to the layout you have the web viewer on, and either add a button or add a script trigger to get it to refresh the web viewer.
Enjoy!
That is the extent of my dive into the Kanban Add-on. It was super easy to get it installed and start playing with it. I’ll be curious to do a deeper diver perhaps in another blog. If Portage Bay can help with your FileMaker solution and/or you want help with integration of Kanban boards, please submit the contact form below with any comments or questions you may have,
Thanks for reading!